Have you been trying to access Shared Albums on your iPhone but can’t seem to find them? This can be frustrating, especially after a fun get-together or family vacation, as Shared Albums are a great feature to view photos among iPhone users easily. But don’t worry! This is a common yet solvable issue I have heard many times from friends and family members. So how do you find and access Shared Albums on your iPhone?
Enable Shared Albums by going to Settings > [your name] > iCloud > Photos, and toggling on the Shared Albums option. Check if your iPhone is signed in to iCloud with your Apple ID, connected to the internet, updated to the latest version of iOS, and has permission to view Shared Albums.
By following these steps, you should be able to access Shared Albums and view the photos and videos shared with you by others. Read further on as I share step-by-step how to find Shared Albums on your iPhone, as well as key tips on how to accept Shared Album invites and create them too.
How to Access Shared Albums on Your iPhone
To find Shared Albums, you first want to check that the feature is enabled on your iPhone so that you can accept invites, view, and create your own Shared Albums. Here is the step-by-step guide to turning on Shared Albums on the iPhone:
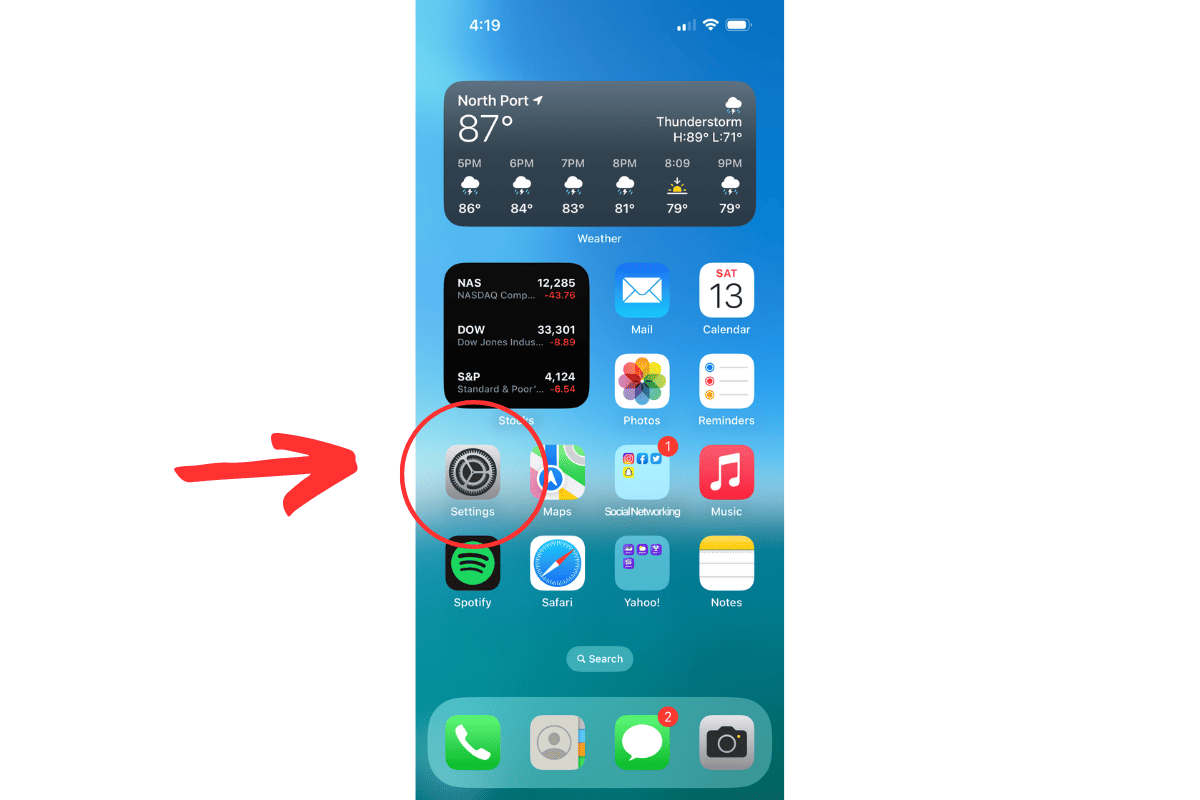
- Tap on the Settings app from the Home Screen, or search for it in Siri Suggestions or the App Library.
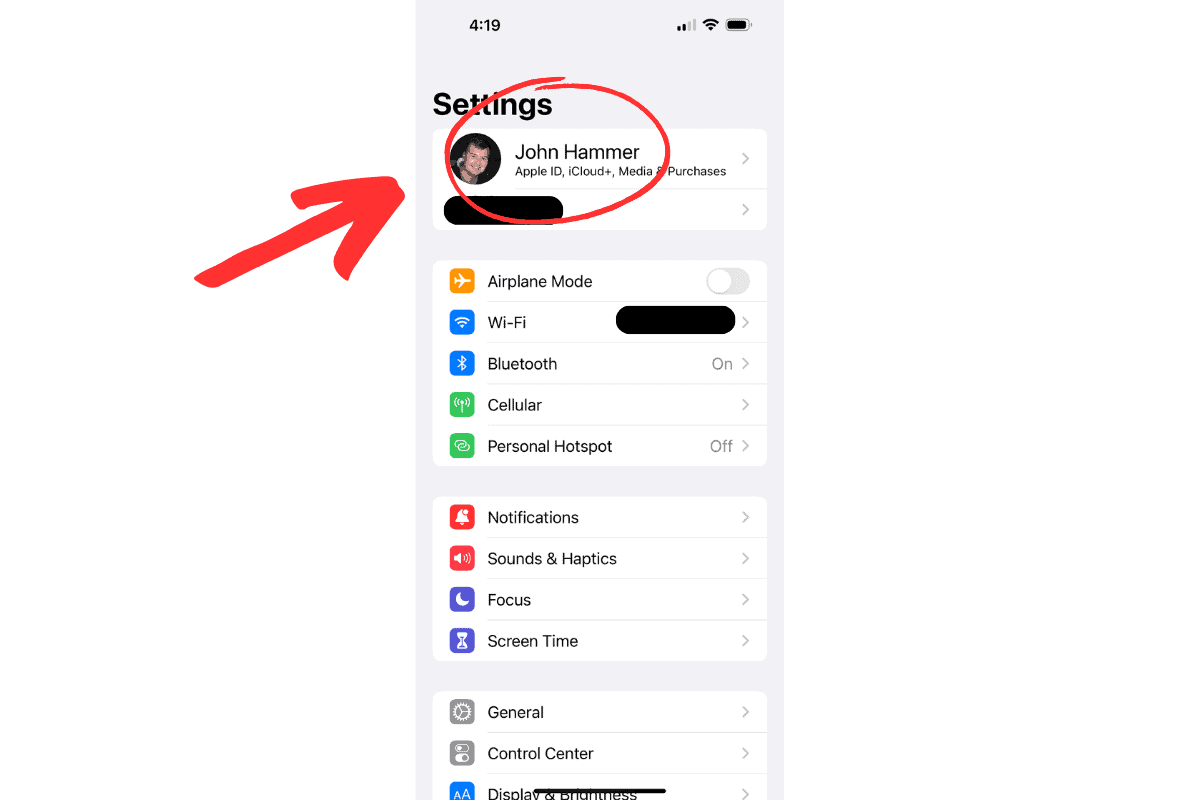
- On the top of the Settings menu and under the title, tap on [Your Name], or the name that you signed in with your iCloud Apple ID. This will bring you to the Apple ID options menu.
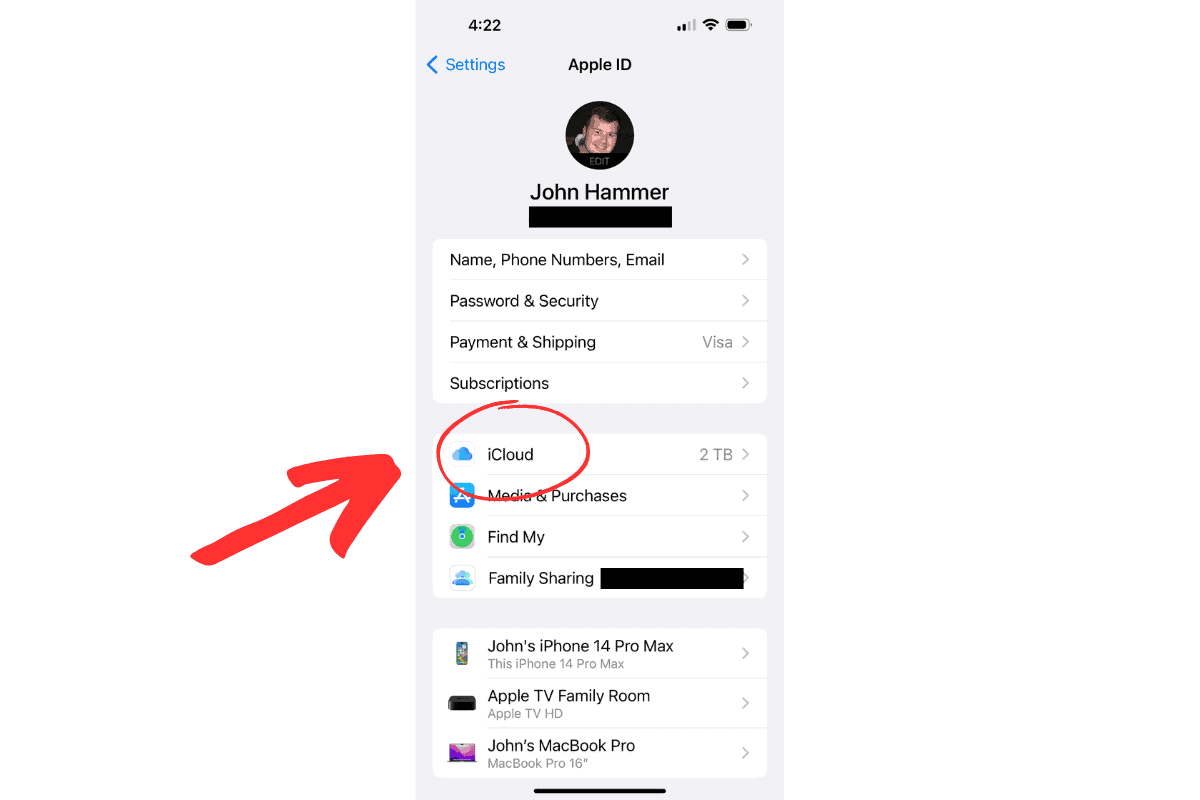
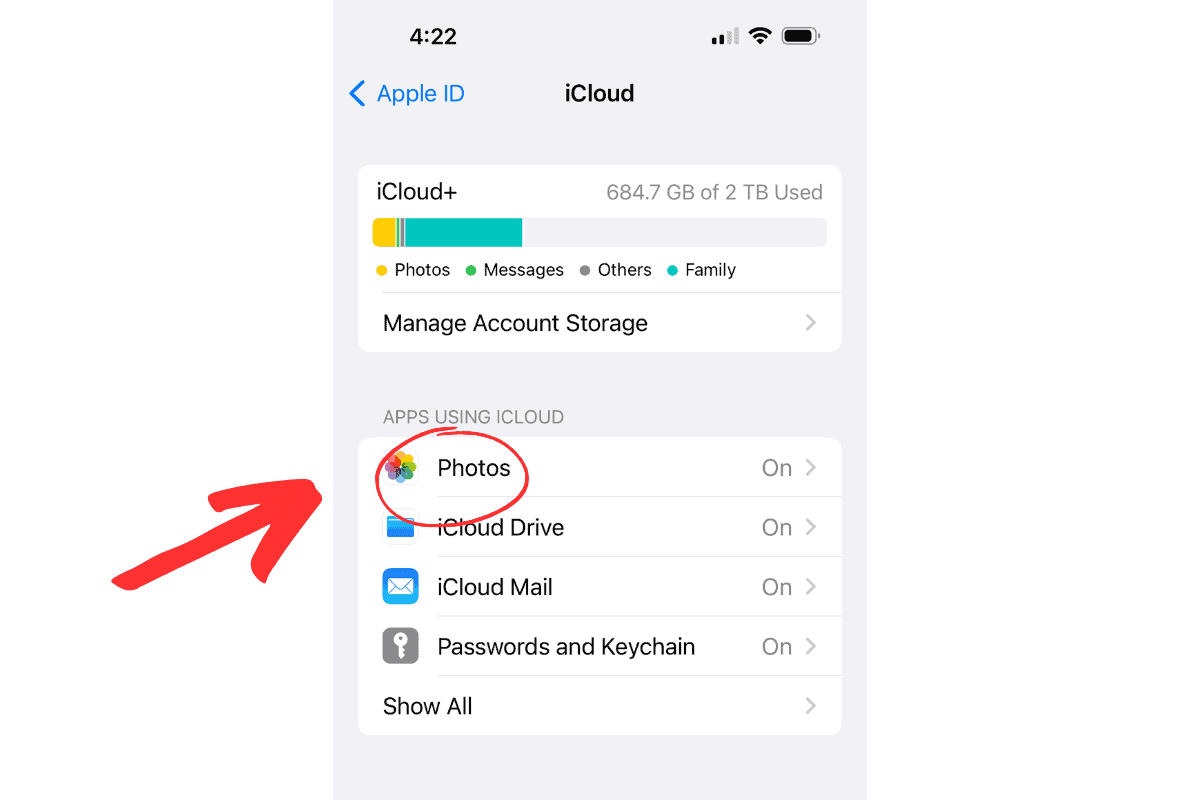
- Tap iCloud
- Under Apps Using iCloud, tap on the Photos option.
- At this point, make sure to scroll all the way down to the bottom of the iCloud Photos menu. Under Albums, tap on the toggle slider next to the Shared Albums option.
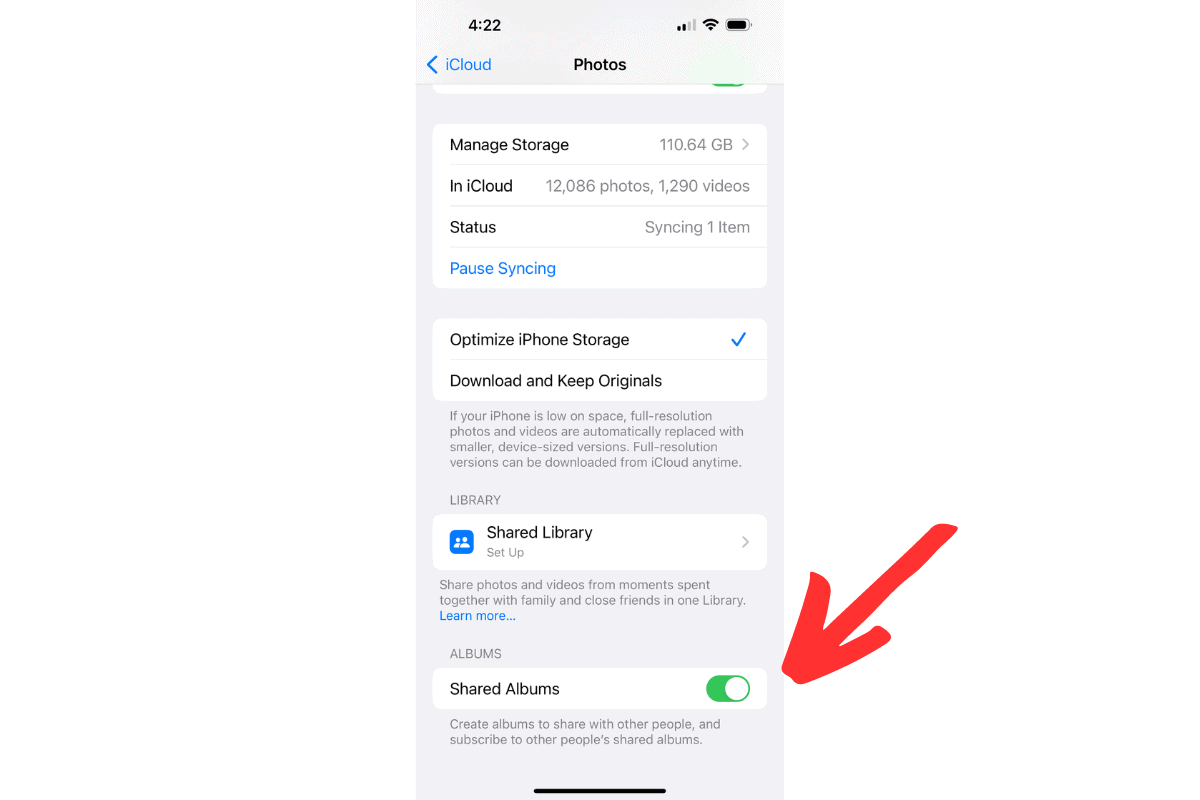
- When Shared Albums is enabled, the toggle should be to the right, and the space next to it should be colored in.
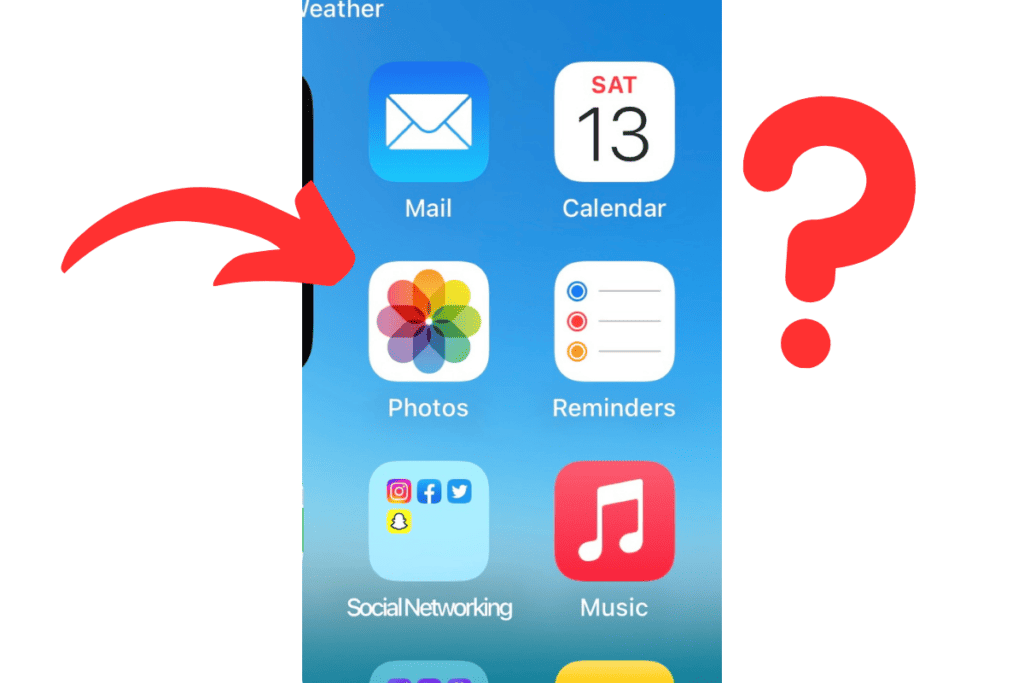
Success! You should now have access to Shared Albums on your iPhone. To find albums that have been shared with you, go to Photos > Albums, and then below the My Albums menu, you should see a new Shared Albums menu.
Sometimes, I’ve seen instances where iPhone users still cannot find or access the Shared Albums menu in their Photos app. Below are some additional points to check for so that you can finally gain access to this feature.
John Hammer wrote and owns this content
How to Sign In to iCloud on Your iPhone
In order to access photos from Shared Albums, check that the iPhone is signed in to your iCloud account. Here’s how to easily accomplish that:
To sign in to iCloud on your iPhone, tap on the Settings app icon from your Home Screen, or search for it under Siri Suggestions or on the App Library page.
Once in the Settings menu, at the top of the page tap Sign in to your iPhone. This will then prompt you to enter your Apple ID and password for the iCloud account you want to sign in with.
Remember: if you do not see a specific Shared Album invite, or it was sent to another user, you will need to sign in to iCloud with the Apple ID that the invite was sent to. Otherwise, notify the Shared Album host to send an invite to the Apple ID you are signing in with.
When you sign in to the right iCloud account, with Apple ID and password, you should now be able to find Shared Albums within the Albums menu in your Photos app. If you are not able to sign in to iCloud at all on your iPhone, read below and check to see if there is an internet connection.
Check if Your iPhone is Connected to the Internet
Shared Albums require an active internet connection to work. Make sure that your iPhone is connected to Wi-Fi or cellular data. If you’re not connected to the internet, you won’t be able to access Shared Albums.
To connect to Wi-Fi: Tap on the Settings app from the Home Screen page, then tap on the Wi-Fi menu option, then under Networks, tap on the [Network Name] that you want to join, and fill in the password if necessary. Once connected, you should see a check mark next to the network name with a picture next to it showing signal strength.
To connect to Cellular Data: Tap on the Settings app from the Home Screen Page, then tap on the Cellular option, and then toggle on Cellular Data. You may also have to scroll down and toggle on the Turn On This Line option under your cellular service provider name.
With a successful connection to the internet, you should now be able to sign in to iCloud using your Apple ID, and enabling Shared Albums under the Photos app.
If the iOS software has not been updated in some time on your iPhone, then the Shared Albums feature may not work properly or appear at all. The following steps will help to ensure that your phone is completely up-to-date.
Check if Your iPhone is Running the Latest Version of iOS
It’s important to make sure that your iPhone is running the latest version of iOS to ensure that it’s compatible with the latest features and security updates.
To check if there are any updates available, go to Settings > General > Software Update. If there’s an update available, tap Download and Install.
Software Safety Tip: Have your iPhone always connected to Wi-Fi and to a power source during the update process, as it can take a while to download and install updates.
When the update is complete, check if you can access the Shared Albums feature. If you still can’t find it, double-check that the feature is enabled by going to Settings > [your name] > iCloud > Photos, and then toggle on the Shared Albums option if it’s turned off.
Now that you’re iPhone is running up to date, is signed in, and connected to the internet, if the Shared Albums issue persists, check to see if you have permission to view the Shared Albums. Here’s how you can get there:
How to Check Permissions to View Shared Albums
If someone else shared an album with you, it’s possible that you may not have permission to view it. To check if you have permission, tap on the Photos app on your iPhone, then tap on Albums along the bottom and look for the Shared Albums tab.
If the album you’re looking for appears there, tap on it to open it. If it doesn’t appear, the person who shared the album may need to resend the invitation to you. Here’s how you can resend an invitation to an already-created Shared Album:
- Tap on the Photos app from the Home Screen on your iPhone.
- Tap on the Albums tab at the bottom of the screen.
- Find the Shared Album you want to resend the invitation for and tap on it to open it.
- Tap on the People tab at the top of the screen.

- Find the person who didn’t receive the invitation or is having trouble accessing the album.
- Tap on their name and tap on the Resend Invitation button.
After the invitation is resent, the person should receive a notification on their iPhone indicating that they’ve been invited to view the shared album. Once they accept the invitation, they should be able to access the album and view its contents.
Now that you’ve learned how to turn on and view Shared Albums from other people, it’s time that we find how to create our own Shared Album so that we can share it with others! The following steps walk through how to start this:
How to Create an iCloud Shared Album on the iPhone
There’s nothing like wrapping up a nice friends trip, awesome concert, or family get-together, by sending a Shared Album with photos of the event from your iPhone. If you’ve been wondering how to start an album that you can easily share with others, here’s how you can create Shared Albums on your iPhone:
- Tap on the Photos app from the Home Screen on your iPhone.
- Tap on the Albums tab at the bottom of the screen.
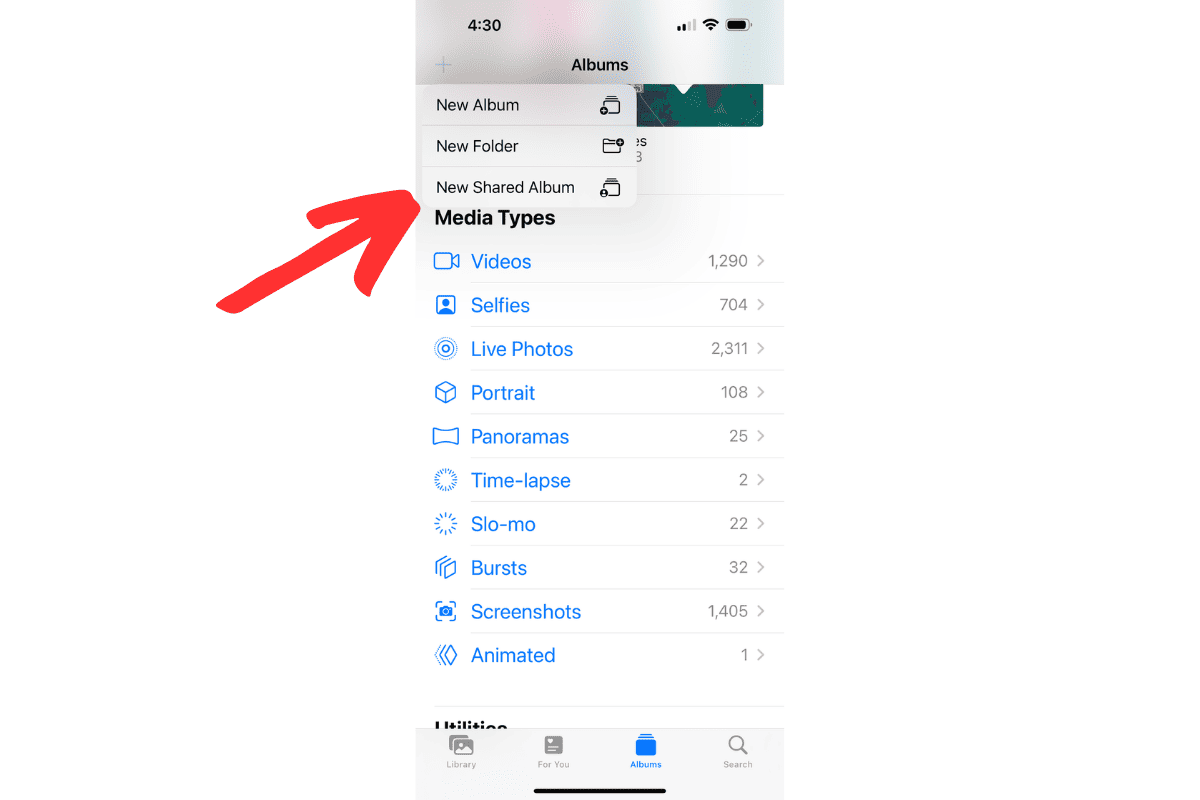
- Tap on the add “+” button at the top left of the Albums screen.
- Tap on New Shared Album, then Name the Shared Album, and tap Next
- Type names of other iPhone users to Send Invite, or tap the “+” to choose people from your Contacts list.
- Tap Create
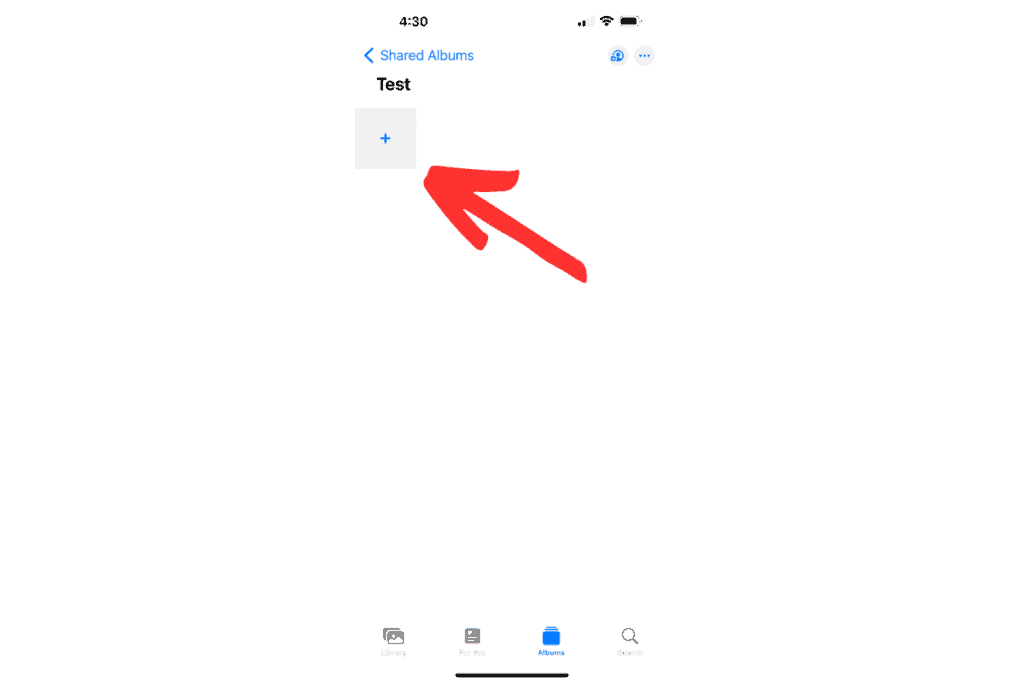
You’ve now created a new Shared Album! After you tap the Create option, you’ll return to the Shared Albums screen, where you can then tap on the freshly created Shared Album, then tap the “+” box to add photos and videos from your existing Camera Roll collection in the Photos app.
On a similar note about creating: If you’re looking to organize not just photos, but also entire applications on your iPhone, I recently published an article you can read here that shares step-by-step how to make Folders on your iPhone so that you can easily find your apps on a clutter-free Home Screen.
But what if you want to share your new shared album with someone who doesn’t use an iPhone? Well, there’s a way you can do that! Here’s How:
How to Share iCloud Shared Albums with Non-Apple Users
There is indeed a way that you can share photos directly from your Shared Albums with people who are non-iPhone users. Spoiler Alert: It does not require you to convince them to buy an iPhone either! Below are the easy steps to sharing photo albums with non-Apple users:
- Tap on the Photos app from the Home Screen on your iPhone.
- Tap on the Albums tab at the bottom of the screen.
- Scroll down to the Shared Albums menu
- Tap on the Shared Album you want to share
- Tap on the People button on the top right of the screen
- Toggle On the Public Website option under the Edit Shared Album menu
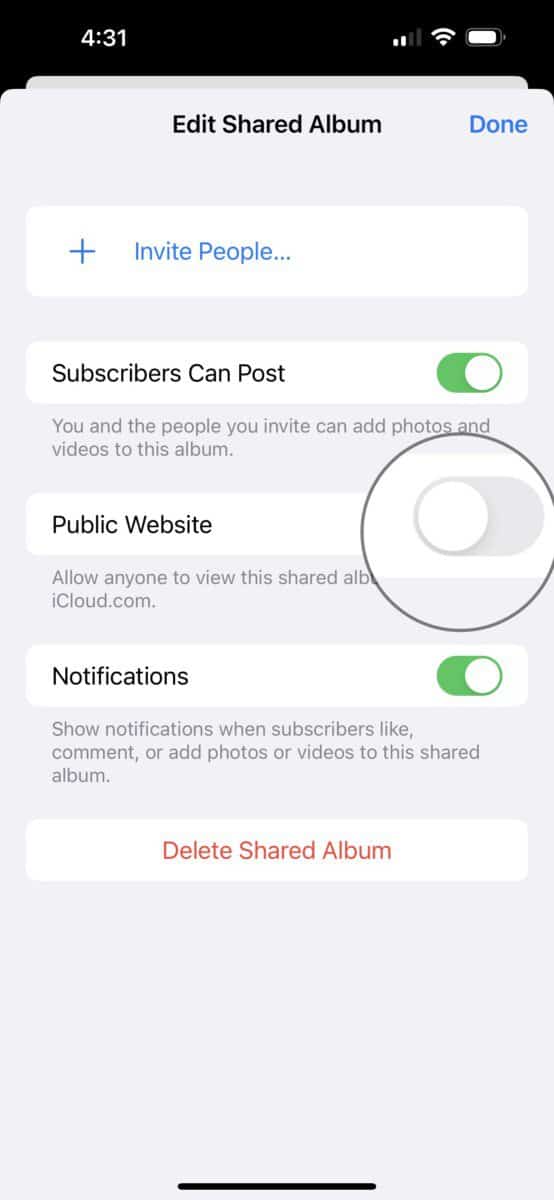
Once the Public Website option is turned on, you will find below a website URL that has been generated showing a copy of your Shared Album. Tap on the Share Link button bar to bring up the menu to Copy, Text Message, and/or E-mail the link to anyone, regardless of the device they are using! Now non-Apple users can view the shared album just like iPhone users can through the native Photos app.
And that’s it! Following these steps, you should now be able to find, invite, and create Shared Albums with ease on your iPhone.
Speaking of things that can be difficult to find: If you’re curious about scanning documents from your iPhone (and where they end up after you scan them!), I detail step-by-step in another Gizbuyer Guide post you can read here on how to make scanning documents on iPhone much easier and a lot more productive.