
So you’ve made the push to ditch the bulky scanner and embrace mobile technology by scanning documents from your iPhone. Pretty cool! Especially when you’re busy working on the road or trapped in a hotel that (gasp!) doesn’t have a scanner in their office, it’s refreshing to know that we can send that urgent document with this handy piece of tech that’s in our pockets. But first let’s recap what all this scanning from our iPhone really means, how you can access this feature easily, and where you can find your scanned documents on your iPhone.
The Definition of Scanning from Your iPhone
As part of the update for iOS 11 a while ago, Apple introduced a native feature inside the Notes app… a document scanner! What this essentially meant was that iPhone users who upgraded to the new version of iOS could now open their Notes app and take a picture of any document that could now be scanned into a PDF and even shared with others. This is still true today and works remarkably well.
How to Access the Scan Documents Feature Inside of the Notes App (With Pictures)
- Find and Open the Notes App from Home
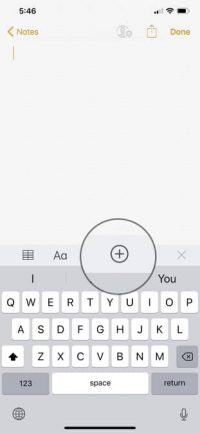
- Tap the camera or “+” button either in the bottom middle of an existing note or off to the side for a new note
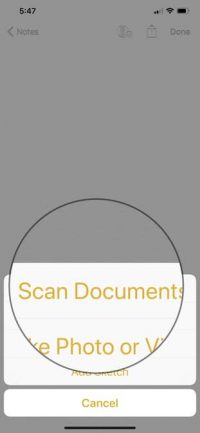
3. Tap Scan Documents
4. Position the document so that the yellow box outlines the entire document

5. If the yellow box does not cover the document automatically, tap the shutter button to manually scan the document
6. If scanning more than one page, keep positioning the documents automatically or tap the shutter button to manually scan each new page
7. When finished tap the Keep Scan, then tap the Save button
Where to Find Your Scanned Documents on Your iPhone
Once you’ve finished scanning your document pages the finished result will be a shaded box placed right on your new note with the title “Scanned Documents”, this is where your scanned documents are saved. Now you can save the note and come back to the scanned documents, edit them with a signature, or share them with contacts and email. Here’s how you can easily markup, convert to a PDF file, and share your fresh scanned document.
- Tap on the Scanned Document and tap the markup button


2. Here you can doodle with the pencil, and erase.
3. Tap the “+” button to add a text box, signature, shape, or magnifier

4. Once finished, tap Done
Convert your Scanned Document to a PDF and Share it from Your iPhone
- Tap on the Scanned Document and tap Create PDF

2. Tap Share

3. Select the app that you want to share the document through

4. Input the rest of the information and share the document
And that’s it! If you are still new to scanning and saving scanned documents from your iPhone it might take a few extra minutes the first couple times, but with practice, the process becomes much easier. It’s great that Apple developed a way for us to scan documents from within the Notes app and without downloading a third-party app that may or may not achieve the same thing. The automation of the scanner and the clarity of the scan make document scanning with the iPhone a breeze and easy to recall at any time in the future.
