If you’ve ever owned a projector, you know that it works well until things go awry. Most of the time, it’s a simple fix. Black spots appearing on the projected screen can become an issue that can be cryptic to diagnose. Here are some simple answers to a complex device that may have a simple fix to needing specialist help. Let’s get your projector working like new again.
What do black spots on a projector mean? Small black spots can mean either that the external lens or the internal LCD projector element inside is dusty. However, if black spots persist after cleaning, it can be way more technical. It could be overheating, or a major technical fix is required.
You will need to have a specialist work with your unit, or—if it’s out of warranty and you’re handy—take it upon yourself to fix it. Everyone knows it’s really frustrating to be watching a movie or playing a game and have those small interruptions like black spots to cloud the clarity of the image. Here are some quick ways to find out what exactly is wrong so you can get back to watching, gaming, or even teaching at 100%.
Projectors 101
A projector, in essence, takes a source from either a TV, computer, gaming console, Blu Ray DVD player, or some other media and translates it into a projected image/movie/game onto a screen. Projectors often use a small Liquid Crystal Display (LCD) combined with Digital Light Projection (DLP) technology internally that is magnified and sent through a lens to project onto a screen.
What Causes Black Spots?
There’s a lot that can go wrong to cause black spots to appear. You need to be sure you can rule out all options before sending it off to a repair shop and paying for new parts and labor to match.
Dirty or Dusty LCD
Black spots have varying sizes. If there are a few small spots across the projected image when the projector is on, it’s likely dust on the LCD Projector inside or on the external lens. If there are black and white spots and it’s all across the projected image, then it is more technical.
Any host of things can cause these black spots. They also don’t look like dust; normally, they’re much larger and cut out major sections of the image. Why they occur is more difficult to explain. Simply put, there can be burned internal elements or broken DMD/DLP chips.
Overheating
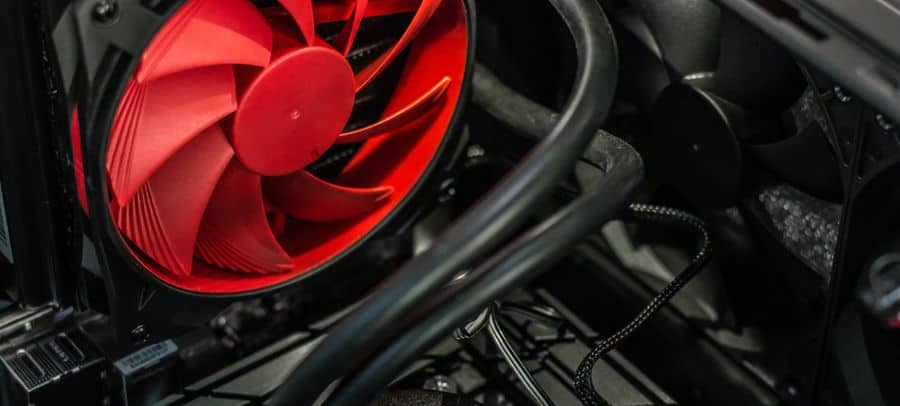
If you are finding your projector is not very well ventilated, and is virtually hot enough to cook an egg, the fix may not be so simple. Your projector should never heat up so that it’s too hot to touch. Things can go very wrong if you let your projector overheat.
Often projectors have a few pegs that act as legs allowing it to be raised from the stand where it sits; this allows the fan to cool units that heat up as it projects an image on the screen. Remove anything near the fans that would keep it from ventilating properly. You can often hear the fan working overtime to try to cool it down.
Some newer projectors have an internal thermometer. It will shut down due to heat consumption on the unit; this happens a lot, but it is not directly related to black spots. Indirect black spots will appear if it’s burned some elements of the LCD projector inside or parts of a DSP projector have been melted or burned due to heat.
Broken or Malfunctioning DMD Chip
On a very simplistic level, most projectors have a component that spins. As the name implies, Digital Micromirror Device, the DMD Chip has a mirror that spins. It spins with light bouncing off of it, dividing color, and allowing light and reducing light to create white and black. There’s often even a prism in some units that further help with light blending and color splitting.
These electronic chips are the main element that mirrors the received image from the LCD projector into the lens and project the image onto the screen. All kinds of things can go wrong from the DMD chip not spinning anymore.
Chips spin fast enough to send the light in the right direction showing an image on the screen. Should something interfere in its ability to work, black spots emerge as a sort of dead spot where the image will not be displayed. It simply cannot reflect light and project what needs to be projected in all areas.
When your black spots aren’t clean away, then the Digital Micromirror Device, also known as the Digital Light Projection Chip, inside that is helping the projector to display your image is likely bad. It can happen due to damage from excessive heat or wear and tear—even faulty parts can cause this issue; this is not an easy fix and requires expert technical assistance to diagnose, replace, or repair. It’s a costly issue.
How to Fix Black Spots on Projectors
These causes aside, we will assume the black spots are occurring in a normal healthy projector. We will tackle things that can be handled before you get to the point of replacement or major expenses.
Step 1: Make Sure the Lens is Clean
If you think of a projector like an eyeball, it’s easier to visualize what’s going on: simply put, clean out the eye, and you can see better.
A clean unit means the image should be free of black spots. It’s the main way the projector sends an image onto a screen or a wall. If that is dirty, chances are your black spots will leave, since dust build-up can accumulate over time.
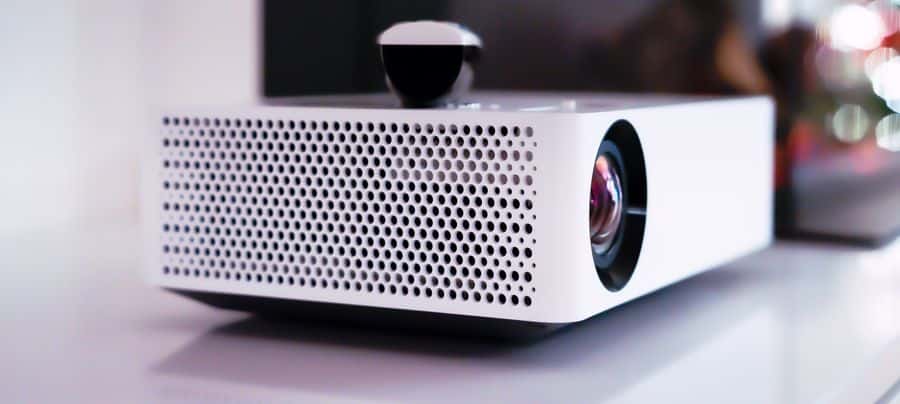
Try to clean the lens. It’s the big piece of curved glass on the front of the unit that sends the amazingly bright light that blinds unsuspecting passersby.
Suggested Steps to Cleaning the Lens:
- Turn off the unit.
- Make sure it’s cool.
- Use a clean, dry or lens-safe cleaning cloth and wipe it down; this keeps any temperature differential from messing with the quality of the lens.
A lot can be fixed by keeping your projector in pristine shape. The more dust free and clean it is, the easier it is to diagnose any image issues. Once it is clean, we can move forward if those epic black spots are still plaguing you.
Step 2: Cleaning the Inside of the Projector
Many of the main issues users find are that they can’t seem to find out what’s going on. First things first, make sure your projector is clean inside as well. Before you go cracking open the case, many times on the bottom of most projectors, there is a tiny door that you can pry open. It’s often hidden under the Product Label. It’s a hidden access spot to the inner workings of the projector. It gives the user easy access to the internal LCD projector. You can simply wipe away dust inside and see the black spots leave.
To Clean the Inside:
- Simply keep the projector on.
- Focus it on the screen, and sharpen the image to make sure you find the black spots
- Turn it upside down.
- Take off the projector label that covers a hidden slot for easy internal LCD access.
- Be careful NOT to look directly at the light coming from the projector; you can damage your eyes.
- Use a simple dry cotton swab and dust off the lens.
- While watching the projected image, you can see the speck leave as you clean it off
- Once black spots are removed, replace the label.
- Flip it right side up, and you’re done!
A Note On Workspaces
Most of the parts of a projector are very delicate and need to be handled with care. While this is a very simplistic answer to the complex inner workings of a projector, you will need experience with similar technical items if you plan on doing the work yourself. It is recommended to seek out experienced professionals to do the work for you in half the time without incurring further damage to other parts.
Should a warranty not be available and you are feeling mechanically sound, here are some ideas for tools that will help you clean the inside of the projector and diagnose any additional problems that could lead to black spots:
- Latex gloves protect the internal elements of the projector from your hands’ oils or dust.
- Simple Phillips screwdrivers are handy should your projector have screws barring access to your internals.
- Small prying chips for popping open firmly attached cases.
- Possibly even a low-grade drill with a screwdriver tip to speed up the opening and closing of the case.
- Cotton swab for cleaning the dirty or dusty items.
You will need to have some sort of air compressor or small blowing device, so you don’t unintentionally end up with spit or dust on your LCD Projector. A simple cotton swab can be used for cleaning the internals. Never add anything to your internal unit that is wet, or you may short the unit.
If cleaning the inside of the projector, in addition to the LCD, doesn’t eliminate the black spot problem, you may need a repair shop to diagnose it.
Clean But Still Seeing Black Spots
If you cleaned the external and internal elements with a simple cloth and swab, but didn’t whisk away your black spot worries, read on. There may be a serious issue with your projector.
Let me save you reading lots of sad forums by summing up that your DLP chip—AKA your DMD chip—may be faulty. The good news is your projector may still be under warranty. Bad news could be that it may cost you money, temporary loss of use, and you need a specialist technician to look at it.
Avoid User Error
Well, now that the projector is clean, and you still have black spots, could it be user error? Certainly. We often bump things we often use, including buttons on the top or side. If you recently installed your projector, chances are you set up the unit just how you wanted. However, with newer users or even in the process of trying to get the unit just right, there may be some user error.
Make sure your settings are correct, and there’s nothing to adjust in the settings menu that would lend itself to create the black spots. This can only be fixed through cycling through the menu system, and checking all the system settings are default and correct. If you find your fix here, consider your job done, but if not, read on.
Replacing Overheated Components
Burning the internal elements of a projector can be very costly. It’s like replacing core components of a car like an engine. A new bulb or internal LCD projector can cost as low as tens to hundreds of dollars, so it may be cheaper to buy a whole new projector. Make sure you still have a warranty should you need a major fix.
Repairing & Replacing DMD Chips

Imagine the lens in your eyeball going bad. You wouldn’t just wash out your eye and carry on. You would take yourself to a specialist and get it taken care of. What if you lost the ability to see color, or had black spots? It’s potentially just a wipe and walk away issue. But when the spots don’t leave, it can be the internals of the unit that’s the issue.
Should that element be damaged through heat or something more serious, you will have to see if it can be fixed or replaced. Some DMD Chips can cost up to $499 on some projector models. Make sure you do everything you know to do before it gets to the point of taking it in for work. No need to spend money when you do not need to for a simple fix at home.
Fixing It Yourself Can Be Costly
While it may be appealing just to crack open the case and take a look at the guts, refrain from doing this. It may void your warranty, even on parts or labor down the road. If you’re not mechanically inclined, you can damage some delicate parts.
Things like oils from your fingers or dust in the work environment, even electromagnetic sources like static, can and often do damage or zap vital parts inside. Great care should be employed if you plan on doing the work yourself.
DMD Chips are sensitive items that require a clean work desk and a pro to assess if it’s working. Only professionals ought to be handling these sensitive chips. While amateur fixers may have YouTube videos on replacing them, use caution and beware that you can, in effect, be damaging your projector beyond repair should you go down this route.
Final Tips for Maintaining Projector Life

While not everything goes to plan, here are some basic tips for maintaining the lifespan of your projector and keeping it black spot free:
- Maintain this machine like you would your television. It’s an investment, treat it like one, and it will pay dividends in hours of entertainment.
- If you plan on using it regularly, keep it in a cool place. Make sure plenty of ventilation is passing through it, so you don’t allow the unit to overheat.
- Once it’s cool and running well, make sure you keep it clean; give it plenty of ventilation and room to work. Avoid keeping it dusty sheds, or in dirty movie rooms. Make sure the dust level is to a minimum as whirling fans, spinning microchips, and whizzing mirrors, tend to attract all the dust floating by. Also, keep in mind that pet dander or other environmental effects can be interfering with the projector’s lifespan.
- Keep your warranty updated and on hand should the unthinkable happen. At a time when most people in the world are staying at home and video streaming has increased by nearly 300%, your projector needs to be covered in case something should happen to it.
- Should black spots have their revenge, find a local specialist dealing in projector and small tv repair. Make sure they work with your warranty and get it in right away to get fixed. If no warranty is possible, consider going the handyman route and fixing it yourself if you are so inclined.
Conclusion
Fixing a projector with black spots is not a simple fix. You need to do some troubleshooting first and then work from the basics to the more complex. Hold back initially from taking it to a specialist, if you can do this at home for minimal cost. Reduce your downtime from not using your projector and save your money. Clean the internal LCD projector. If that doesn’t do it, you’ll need to make sure your settings are correct and then check the warranty.
If you have a warranty, call the company and look at your options. If no warranty, check with a local repair shop about the cost of repairing a potential DMD/DLP chip. Sometimes it’s free to drop the unit by for a quick peek, and they will call you before they do any work to find the root cause.
Take great care of your projector, and you can avoid any major issues unless the unimaginable happens. If that happens, make sure you got the coverage you paid for and get it fixed by a professional fast.
References:
https://www.dell.com/community/Projectors/Black-and-White-spots-on-the-screen/td-p/3829821